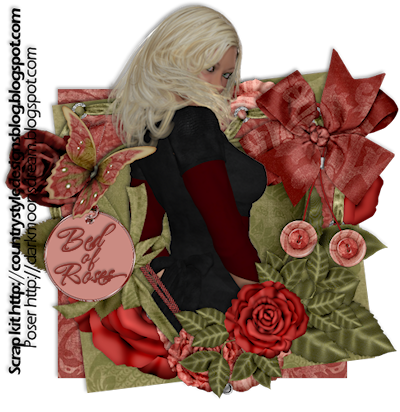
Bed of Roses
This tutorial is my own creation and based on my own ideas. Any and all similarities with any other tutorial is purely coincidental.
Please do not upload to or offer this tutorial on any other site without asking me first. Thank you.
Material you will need:
PaintshopPro – I’m using PSP X2, but you should be able to follow the tutorial in any version.
A scrap kit – I used the awesome kit Bed of Roses by Country Style Designs, which you can purchase here.
A font of your choice.
A tube of your choice.
No filters required.
Now, let’s get started. It might be helpful if you choose the elements you wish to use beforehand, and open them up in PSP prior to starting the tutorial. That way, you have them handy when following each step.
Also, you don’t have to slavishly follow each positioning nor setting – play and experiment a bit, especially if you use different elements.
If you are unsure how to position an element, refer back to my sample tag.
I do assume you have at least some to moderate experience and understanding of PSP.
The DropShadow throughout the tutorial remains the same: V/H -2/-2 O/B 38/5.95.
Resizing throughout the tutorial is done with “Resize all Layers” NOT checked.
Open a new image, 600x600.
Open BOR_HeartEyelet2_CSD, copy&paste, Resize 65%.
New layer, underneath frame layer and click with your Magic Wand inside the frame, Selections – Expand by 2.
Open BOR_Paper1_CSD, copy, and on new layer, Paste into selection, Select none.
Merge both layers visibly, Apply Dropshadow.
Open BOR_Leaves3_CSD, copy&paste, Resize 45%, move to the right and bottom of the heartframe, Apply Dropshadow.
Open BOR_Rose8_CSD, copy&paste, Resize 45%, move to the left and a bit up, Apply Dropshadow.
Open BOR_Heartbox2_CSD, copy&paste, Resize 57%, position centered.
Open your tube, copy&paste, Resize and position to liking, centered on top of the box.
Optional: click with your Magic Wand outside the box, and on your tube layer, use the Eraser Tool to erase parts of the tube you don’t want to stick out over the box, Select none.
Apply Dropshadow to both box as well as tube.
Open BOR_Rose10_CSD, copy&paste, Resize 37%, move to the bottom right of the box, Apply Dropshadow.
Open BOR_Bow1_CSD, copy&paste, Resize 40%, move underneath tube layer, to the upper right corner, Apply Dropshadow.
Open BOR_Fastener3_CSD, copy&paste, Resize 37%, move underneath bow, Apply Dropshadow.
Open BOR_String1_CSD, copy&paste, Resize 50%, Free Rotate – Left – 35 degrees, place on top of tube layer, Apply Dropshadow.
Open BOR_Ribbon and Bow1_CSD, Resize 45%, Free Rotate – Right – 62 degrees, and move a bit further to the left than the string, Apply Dropshadow.
Open BOR_Rose15_CSD, copy&paste, Resize 27%, move to the bottom, a bit to the right, Apply Dropshadow.
Optional: I used the Point-to-Point tool to erase some of the upper part of the ribbon.
Open BOR_Tag2_CSD, copy&paste, Resize 50%, move to the upper left on the box, Apply Dropshadow.
Open BOR_Rose14_CSD, copy&paste Resize 40%, Arrange – Send to Bottom, place to the bottom left, Duplicate and move copy to the upper right, Apply Dropshadow to both.
Open BOR_Rose16_CSD, copy&paste, Resize 35%, Move on top of the previous roses, to the bottom left, Duplicate and move the copy to the upper right, Apply Dropshadow to both.
Open BOR_Butterfly3_CSD, copy&paste, Resize 33%, Arrange – Bring to Top, position to the left side, Apply Dropshadow.
Open BOR_Paper4, copy&paste, Resize 50%, Free Rotate – Left – 7 degrees, Arrange – Send to Bottom, Apply Dropshadow.
Open BOR_Paper6, copy&paste, Resize 50%, Arrange – Send to Bottom, Dropshadow.
Now, the next step is to add any further text, copyright information and your watermark to the graphic.
Feel free to merge all layers visible and then resize to your liking or crop the image.
If you prefer a transparent background, save your tag in PNG format.
Otherwise, if you select the JPG, it will automatically add a white background.
Should you care for a different colored background:
New layer, arrange, send to bottom, and floodfill with your color of choice.
I hope you enjoyed this tutorial!
XOXOXO,
Dani


No comments:
Post a Comment