Showing posts with label Kreative Kreations Korner. Show all posts

Monday, July 5, 2010

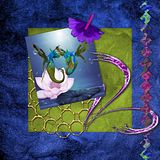
2 LO's - Peacock by Jessica's Sweet Nothings

Good evening!

I have 2 new LO's I made using the beautiful kit Peacock by Jessica's Sweet Nothings. You can purchase the kit here.

LO 1

JSN_Peacock1_DMD

LO 2

JSN_Peacock2_DMD

Thank you for looking!

XOXOXO,
Dani

Thursday, July 1, 2010

2 new LO's - Welcome America

Hi!

I've made 2 new LO's using the wonderful kit Welcome America by Dana's Creative Studio, which you can purchase here.

LO 1

DCS_WelcomeAmerica1_DMD

LO 2

DCS_WelcomeAmerica2_DMD

Thank you for looking!

XOXOXO,
Dani

Tuesday, June 29, 2010

2 LO's - Kimberly by Amy's Scrap Place

Hi!

I've also got 2 new LO's made using the cutie kit Kimberly by Amy's Scrap Place, which you can purchase here.

LO 1
AM_Kimberly1_DMD


LO 2
AM_Kimberly2_DMD


Thank you for looking!

XOXOXO,
Dani

Thursday, April 29, 2010

2 Layouts - Changing This Day

Hi!

Yup, 2 more LO's. This time I've used the fabulous kit Changing this day by Dana's Creative Studio, which you can purchase here.

Layout 1

DCS_ChangingThisDay1_DMD

Layout 2

DCS_ChangingThisDay2_DMD

Thank you for looking!

XOXOXO,
Dani

Tuesday, April 27, 2010

2 New Layout's - Frolick by Designs by Marcie

Hi!

I've made two new LO's using the cute kit Frolick by Designs by Marcie, which you can purchase at Kreative Kreations Korner here:

LO 1

MAS_Frolick1_DMD

Lo 2

MAS_Frolick2_DMD

(Please click on the thumbnails to see fullsize LO's)

Thank you for looking!

XOXOXO,
Dani

Monday, April 12, 2010

2 More Layouts - Au Hasard

Hello!

And, I have two more new layouts. This time I've been using the beautiful kit Au Hasard by Vavie Design, which you can purchase here:

Vavie_AuHasard1_DMD

Vavie_AuHasard2_DMD

(Please click on the thumbnails to view the fullsize layout)

Thank you for looking!

XOXOXO,
Dani

Wednesday, March 31, 2010

2 Layouts - It's A Girl Thing

Hello!

And I've made 2 more layouts. This time, I used the wonderful kit It's A Girl Thing by Kimberly Schlehan Designs, which you can purchase here.

Layout 1

KSD_ItsAGirlThing1_DMD

Layout 2

KSD_ItsAGirlThing2_DMD

Poserart used was made by me.
Thank you for looking!

Hugs,
Dani

Sunday, March 28, 2010

Tut - Girly Girl

WWD_GirlyGirl_DMD

Girly Girl

This tutorial is my own creation and based on my own ideas. Any and all similarities with any other tutorial is purely coincidental.
Please do not upload to or offer this tutorial on any other site without asking me first. Thank you.

Material you will need:

PaintshopPro – I’m using PSP X2, but you should be able to follow the tutorial in any version.
A scrap kit – I used the cute kit Girly Girl by Wacky Winnie Designz, which you can purchase here.
A font of your choice.
2 masks –I used WSL 230 and 238, created by Weescotslass, which is  included in the material. Check out her blog here for further masks.
No filters required.
You can get the material here.

Now, let’s get started. It might be helpful if you choose the elements you wish to use beforehand, and open them up in PSP prior to starting the tutorial. That way, you have them handy when following each step.
Also, you don’t have to slavishly follow each positioning nor setting – play and experiment a bit, especially if you use different elements.
If you are unsure how to position an element, refer back to my sample tag.
I do assume you have at least some to moderate experience and understanding of PSP.

The DropShadow throughout the tutorial remains the same: V/H 2/1 O/B 35/4.55.
Resizing throughout the tutorial is done with “Resize all Layers” NOT checked.
Open a new image, 600x550, transparent background.
Open WWDFrame2, copy&
paste, Resize 30%.
Open WWDPaper10, copy.
On frame layer, click with your Magic Wand inside the frame.
Selections – Modify – Expand by 3.
New layer, underneath frame layer, paste into selection.
Selections – Select none.
Open WWDHippo1, copy&paste, Resize 35%, move under frame layer, a bit to the left and bottom.
Click with your Magic Wand inside the frame, Selections – Modify – Expand by 3.
On hippo layer, Selections – Invert, hit “Delete”.
Apply Dropshadow to hippo.
Open WWDRibbon1, copy&paste, Resize 35%, move on top of frame layer, Free Rotate – Left – 37 degrees and move to the left side of frame.
Open WWDRibbon2, copy&paste, Resize 35%, move underneath first ribbon layer, Free Rotate – Left – 17 degrees, move a bit further to the right of the first ribbon.
With your Magic Wand, click outside the frame, go to each ribbon layer, and hit “Delete”.
Apply Dropshadow to frame, and both ribbons.
Open WWDBinderclip1, copy&paste, Resize 25%, Free Rotate – Left – 6 degrees, move on top of the ribbon layers, to the top edge of the frame.
Apply Dropshadow.
Open WWDFlowerPendant2, copy&paste, Resize 32%, Mirror, on top of frame layer and move to the bottom of the frame.
Apply Dropshadow.
Open WWDFlowerSpray2, copy&paste, Resize 35%, move on top of frame layer, to the right upper corner of frame.
Apply Dropshadow.
Open WWDBow1, copy&paste, Free Rotate – Left – 90 degrees, Resize 26%, move underneath spray layer (on top of pendant layer), to the right edge of the frame.
Apply Dropshadow.
Open WWDCallaLilies1, copy&paste, Resize 25%, Mirror, move underneath pendant layer, to the left of the frame, and a bit to the bottom.
Optional: I erased the bottom part of the stem that was sticking out underneath the pendant.
Apply Dropshadow.
Open WWDRain1, copy&paste, Resize 30%, move underneath frame layer, and position to liking.
Optional: I erased parts of the rain hanging ‘in’ the face of the hippo.
Apply Dropshadow.
Open WWDRain2, copy&paste, Resize 30%, move underneath frame layer, and position to liking.
Optional: I again erased some of the rain that was hanging ‘in’ the face of the hippo.
Apply Dropshadow.
Open WWDButterfly2, copy&paste, Resize 30%, move to the top and position to the left of frame.
Apply Dropshadow.
Open WWDSachet1, copy&paste, Resize 25%, move underneath calla lilies, to the bottom left of frame.
Apply Dropshadow.
Open WWDDoodle1, copy&paste, Resize 40%, Mirror, send to bottom and move to the bottom and right of the frame.
Apply Dropshadow.
New Layer.
Open WWDPaper6, copy.
On New Layer, Selections – Select All – paste into selection.
Layers – Load/Save Mask – Load Mask – MaskWSL_238.
Fit to layer, show all masks, source luminance checked; invert transparency NOT checked.
Merge group.
Optional: resize mask or use your Deformation Tool, if necessary, to tweek your mask layers to your liking and/or lower the opacity.
New Layer.
Open WWDPaper21, copy.
On New Layer, Selections – Select All – paste into selection.
Layers – Load/Save Mask – Load Mask – MaskWSL_230.
Fit to layer, show all masks, source luminance checked; invert transparency NOT checked.
Merge group.
Optional: resize mask or use your Deformation Tool, if necessary, to tweek your mask layers to your liking and/or lower the opacity.
Optional: I merged both mask layers after I used the Deformation Tool, and lowered Opacity to 70%.

Now, the next step is to add any further text, copyright information and your watermark to the graphic.
Feel free to merge all layers visible and then resize to your liking or crop the image.
If you prefer a transparent background, save your tag in PNG format.
Otherwise, if you select the JPG, it will automatically add a white background.
Should you care for a different colored background:
New layer, arrange, send to bottom, and floodfill with your color of choice.

I hope you enjoyed this tutorial!

XOXOXO,
Dani

Wednesday, February 24, 2010

Layouts - All You Need Is Love

Hello!

I made a couple of layouts using Kris Mazy's (aka ScrapWarrior) lovely kit All You Need Is Love, which you can purchase here.

(Please click on the thumbnail to see the fullsize layout)

SW_AllYouNeedIsLove1_DMD

SW_AllYouNeedIsLove2_DMD

Poserart used made by me.

Thanks for looking!

XOXOXO,
Dani

Monday, February 22, 2010

Layouts - EllenM's Burgundy Glitz

Hi!

Well, I'm switching it up a little bit, lol. Love tuts, but thought I'd also try my hand at making a couple of layouts for CT's.

Here are two layouts I made using the beautiful kit Burgundy Glitz by EllenM:

(click on the thumbnails to see the fullsize layout:)

EllenM_BurgundyGlitz_Layout1

EllenM_BurgundyGlitz_Layout2

Artwork used in both layouts was made by me. =)
Thanks for looking!

XOXOXO,
Dani

Saturday, January 30, 2010

Tut - Ribbons, Butterflies & Bows

TTS_RibbonsButterflies&Bows_DMD

Ribbons, Butterflies & Bows
This tutorial is my own creation and based on my own ideas. Any and all similarities with any other tutorial is purely coincidental.
Please do not upload to or offer this tutorial on any other site without asking me first. Thank you.

Material you will need:

PaintshopPro – I’m using PSP X2, but you should be able to follow the tutorial in any version.
A scrap kit – I used the cute, playful kit Ribbons, Butterflies & Bows by Tezzas Tagger Scraps, which you can purchase here.
A font of your choice.
A mask –I used WSL 283 and 305, created by Weescotslass, which is included in the material. Check out her blog here for further masks.
No filters required.
You can get the material here.

Now, let’s get started. It might be helpful if you choose the elements you wish to use beforehand, and open them up in PSP prior to starting the tutorial. That way, you have them handy when following each step.
Also, you don’t have to slavishly follow each positioning nor setting – play and experiment a bit, especially if you use different elements.
If you are unsure how to position an element, refer back to my sample tag.
I do assume you have at least some to moderate experience and understanding of PSP.

The DropShadow throughout the tutorial remains the same: V/H 1/2 O/B 45/6.15.
Resizing throughout the tutorial is done with “Resize all Layers” NOT checked.
Open a new image, 550 x 550, transparent background.
Open Tezzas sequinheart, copy&paste, Resize 70%.
Open Tezzas background4, copy.
With your Magic Wand, click inside the heart.
Selections – Modify – Expand by 2.
New layer, move underneath heart, and paste into selection.
Selections – Invert
New layer, move on top of the paper layer.
Effects – 3DEffects – Cutout: V/H 3/3 O/B 40/7.45.
Selections – Select none.
Highlight heart layer, merge down twice (frame, cutout and paper).
Apply Dropshadow.
Open Tezzas bird1, copy&paste, Resize 80%, position to your liking, on top of the frame if you want to do it like I did.
Option 1: If you don’t want your bird ‘sticking out’ of the frame, just resize it to fit into the frame.
Option 2: if you’d like it to stick out of the frame, resize it about the 80% as indicated, position to your liking, then click with your Magic Wand inside the heart, Selections – Invert, using your Eraser Tool to erase the parts you don’t want to stick out and when finished, Selections – Select None.
Apply Dropshadow.
Open Tezzas roundscallop1, copy&paste, Resize 55%, move underneath frame.
I have not applied a dropshadow here, but feel free to do so.
Open Tezzas crochetflower1, copy&paste, Resize 75%, move under frame, into the left upper corner.
Apply Dropshadow.
Open Tezzas crochetflower2, copy&paste, Resize 75%, move under frame and to the right and bottom.
Optional: I erased the upper right part of crochetflower2.
Apply Dropshadow.
Open Tezzas curledribbon2, copy&paste, Resize 85%, Mirror, and move under bird, to the right and upper corner of the frame.
Apply Dropshadow.
Open Tezzas butterfly3, Resize 50%, and place on top of the curledribbon.
Apply Dropshadow.
Open Tezzas flower8, copy&paste, Resize 30%, position under butterfly, a bit to the right and down and duplicate.
Move the copy of flower8 up a little bit.
Apply Dropshadow.
Open Tezzas flower4, copy&paste, Resize 35% and ove and place on top of both flower8 layers.
Apply Dropshadow.
Open Tezzas flower6, copy&paste, Resize 35%, place to the bottom and left of the frame.
Duplicate, Mirror, Flip and move the copy a bit up.
To apply a Dropshadow to both flowers, without darkening the center of the flower: with your Magic Wand, click outside the first flower, Selections – Invert, Apply your Dropshadow, Selection – Select none. Repeat for second flower6.
Open Tezzas flower3, copy&paste, Resize 30% and place on top of the flower6.
Apply Dropshadow.
Duplicate, and move underneath flower6 layers.
Apply Dropshadow.
New layer, Arrange – Send to bottom.
Selections – Select All.
Open Tezzas background5, copy.
On new layer, paste into selection.
Selections – Select none.
Layers – Load/Save Mask – Load Mask – MaskWSL_305.
Fit to layer, show all masks, source luminance checked; invert transparency NOT checked.
Merge group.
Resize 80% and use your Point-to-Point Selection Tool, ‘zig-zag’ around the mask (encircle it).
Selections – Invert.
Selections – Modify – Feather 15 and on the mask layer, hit delete once.
Selections – Select none.
New Layer, Send to bottom.
Selections – Select all.
Open Tezzas background10, copy and on new layer, paste into selection.
Selections – Select none.
Layers – Load/Save Mask – Load Mask – MaskWSL_283.
Fit to layer, show all masks, source luminance checked; invert transparency NOT checked.
Merge group.
Optional: resize mask or use your Deformation Tool, if necessary, to tweek your mask layers to your liking and lower opacity if you want (I lowered mine to 78%).
Now, the next step is to add any further text, copyright information and your watermark to the graphic.
Feel free to merge all layers visible and then resize to your liking or crop the image.
If you prefer a transparent background, save your tag in PNG format.
Otherwise, if you select the JPG, it will automatically add a white background.
Should you care for a different colored background:
New layer, arrange, send to bottom, and floodfill with your color of choice.

I hope you enjoyed this tutorial!

XOXOXO,
Dani
Friday, January 1, 2010

Kreative Kreations Korner - Grand Opening & CU Grab Bag


KK~GrandOpening


Happy New Year to all of you!!!

Mark your calender for our Grand Opening at January 29th 2010!!

We are OPEN!!!!

Be sure you get our CU Grabbag!


KK~CUGrabBag~Jan2010


This grabbag contains 19 CU packs our designers made!

So you only pay for about 25 cents per CU pack!

Go HERE to see this fabulous Grabbag!

When you're interested in becoming a designer, this are our requirements!


*NO set up fees

*4 Store wide sales and 4 collabs per yr Required
*All others are not mandatory

*No monthly upload requirements

*3 Contracts to choose from Exclusive,Semi Exclusive,Non Exclusive

25/75 20/80 15/85


Just Design and have fun.