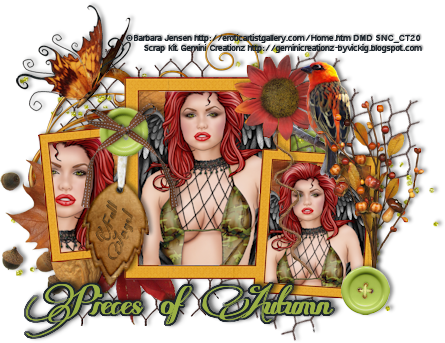
Pieces of Autumn
This tutorial is my own creation and based on my own ideas. Any and all similarities with any other tutorial is purely coincidental.
Please do not upload to or offer this tutorial on any other site without asking me first. Thank you.
Material you will need:
PaintShopPro – I’m using PSP X2, but you should be able to follow the tutorial in any version.
A scrap kit – I used the gorgeous kit Pieces of Autumn by Gemini Creationz. Check out here blog to find stores she sells in here.
A font of your choice.
A tube of your choice. I used the beautiful tube Suits Me by Barbara Jensen, which you can purchase at Scraps N Crap here.
No filters required.
Now, let’s get started. It might be helpful if you choose the elements you wish to use beforehand, and open them up in PSP prior to starting the tutorial. That way, you have them handy when following each step.
Also, you don’t have to slavishly follow each positioning nor setting – play and experiment a bit, especially if you use different elements.
If you are unsure how to position an element, refer back to my sample tag.
I do assume you have at least some to moderate experience and understanding of PSP.
The DropShadow throughout the tutorial remains the same: V/H -1/3 O/B 44/5.05.
Resizing throughout the tutorial is done with “Resize all Layers” NOT checked.
Open new image.
600 x 600 px, 72 dpi.
Open gemini_piecesofautumn_paperframe.
Copy & paste.
Resize 55%.
Open your tube.
Copy & paste.
Duplicate twice.
Resize & position to liking in frame sections.
Magic Wand.
Click inside each frame section.
Selections – Modify – Expand by 3.
Selections – Invert.
On tube layers – hit “delete”.
Keep selection.
Selections – Invert.
Open gemini_piecesofautumn_p7.
Copy.
New layer.
Arrange – Send to Bottom.
Paste into Selection.
Selections – Select none.
Merge visible.
Open gemini_piecesofautumn_foliagenuts.
Copy & paste.
Resize 30%.
Mirror.
Arrange – Send to Bottom.
Position to the bottom left.
Open gemini_piecesofautumn_glitterscatter.
Copy & paste.
Resize 95%.
Arrange – Send to Bottom.
Open gemini_piecesofautumn_doodleswirl2.
Copy & paste.
Resize 35%.
Arrange – Send to Bottom.
Position towards upper left.
Open gemini_piecesofautumn_chickenwire.
Copy & paste.
Resize 35%.
Arrange – Send to Bottom.
Duplicate.
Original, move to the left.
Duplicate.
Free Rotate – Right – 29 degrees.
Move a bit further to the right.
Open gemini_piecesofautumn_bird.
Copy & paste.
Resize 27%.
Position a bit above upper right frame.
Open gemini_piecesofautumn_fallbranch2.
Copy & paste.
Resize 25%.
Position to the right.
Open gemini_piecesofautumn_button1.
Copy & paste.
Resize 25%.
Duplicate twice.
Original, position to the bottom right.
First duplicate.
Free Rotate – Left – 26 degrees.
Position to the upper left.
Second duplicate.
Free Rotate – Right – 18 degrees.
Move underneath frame layer.
Position in upper right.
Open gemini_piecesofautumn_string.
Copy & paste.
Resize 25%.
Position upper center-right.
Where center and right frame join.
Open gemini_piecesofautumn_flower2.
Copy & paste.
Resize 15%.
Position upper right corner.
Open gemini_piecesofautumn_butterfly.
Copy & paste.
Resize 25%.
Position in upper left.
Open gemini_piecesofautumn_ribbon4.
Copy & paste.
Resize 25%.
Position to the left, on top of button.
Open gemini_piecesofautumn_leaftag.
Copy & paste.
Resize 50%.
Free Rotate – Right – 6 degrees.
Position to the left, under button.
Apply Dropshadow as desired.
Add any further text, copyright information and watermark to the graphic.
Always double-check size of your final tag to make sure you are within TOU of the tube licensing company / artist who’s tube you are using.
Merge visible.
Crop or use Selection Tool – Layer Opaque, Image – Crop to Selection.
If you prefer a transparent background, save your tag in PNG format.
Otherwise, if you select the JPG, it will automatically add a white background.
Should you care for a different colored background:
New layer, arrange, Send to Bottom, and fill with your color of choice.
I hope you enjoyed this tutorial!
XOXOXO,
Dani


