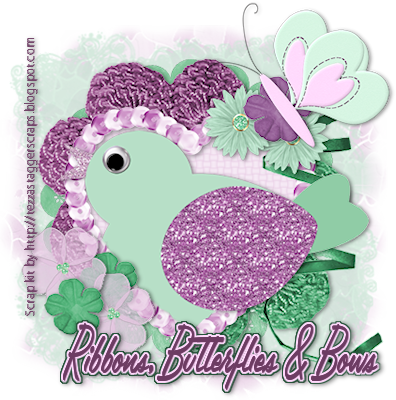
Ribbons, Butterflies & Bows
This tutorial is my own creation and based on my own ideas. Any and all similarities with any other tutorial is purely coincidental.
Please do not upload to or offer this tutorial on any other site without asking me first. Thank you.
Material you will need:
PaintshopPro – I’m using PSP X2, but you should be able to follow the tutorial in any version.
A scrap kit – I used the cute, playful kit Ribbons, Butterflies & Bows by Tezzas Tagger Scraps, which you can purchase here.
A font of your choice.
A mask –I used WSL 283 and 305, created by Weescotslass, which is included in the material. Check out her blog here for further masks.
No filters required.
You can get the material here.
Now, let’s get started. It might be helpful if you choose the elements you wish to use beforehand, and open them up in PSP prior to starting the tutorial. That way, you have them handy when following each step.
Also, you don’t have to slavishly follow each positioning nor setting – play and experiment a bit, especially if you use different elements.
If you are unsure how to position an element, refer back to my sample tag.
I do assume you have at least some to moderate experience and understanding of PSP.
The DropShadow throughout the tutorial remains the same: V/H 1/2 O/B 45/6.15.
Resizing throughout the tutorial is done with “Resize all Layers” NOT checked.
Open a new image, 550 x 550, transparent background.
Open Tezzas sequinheart, copy&paste, Resize 70%.
Open Tezzas background4, copy.
With your Magic Wand, click inside the heart.
Selections – Modify – Expand by 2.
New layer, move underneath heart, and paste into selection.
Selections – Invert
New layer, move on top of the paper layer.
Effects – 3DEffects – Cutout: V/H 3/3 O/B 40/7.45.
Selections – Select none.
Highlight heart layer, merge down twice (frame, cutout and paper).
Apply Dropshadow.
Open Tezzas bird1, copy&paste, Resize 80%, position to your liking, on top of the frame if you want to do it like I did.
Option 1: If you don’t want your bird ‘sticking out’ of the frame, just resize it to fit into the frame.
Option 2: if you’d like it to stick out of the frame, resize it about the 80% as indicated, position to your liking, then click with your Magic Wand inside the heart, Selections – Invert, using your Eraser Tool to erase the parts you don’t want to stick out and when finished, Selections – Select None.
Apply Dropshadow.
Open Tezzas roundscallop1, copy&paste, Resize 55%, move underneath frame.
I have not applied a dropshadow here, but feel free to do so.
Open Tezzas crochetflower1, copy&paste, Resize 75%, move under frame, into the left upper corner.
Apply Dropshadow.
Open Tezzas crochetflower2, copy&paste, Resize 75%, move under frame and to the right and bottom.
Optional: I erased the upper right part of crochetflower2.
Apply Dropshadow.
Open Tezzas curledribbon2, copy&paste, Resize 85%, Mirror, and move under bird, to the right and upper corner of the frame.
Apply Dropshadow.
Open Tezzas butterfly3, Resize 50%, and place on top of the curledribbon.
Apply Dropshadow.
Open Tezzas flower8, copy&paste, Resize 30%, position under butterfly, a bit to the right and down and duplicate.
Move the copy of flower8 up a little bit.
Apply Dropshadow.
Open Tezzas flower4, copy&paste, Resize 35% and ove and place on top of both flower8 layers.
Apply Dropshadow.
Open Tezzas flower6, copy&paste, Resize 35%, place to the bottom and left of the frame.
Duplicate, Mirror, Flip and move the copy a bit up.
To apply a Dropshadow to both flowers, without darkening the center of the flower: with your Magic Wand, click outside the first flower, Selections – Invert, Apply your Dropshadow, Selection – Select none. Repeat for second flower6.
Open Tezzas flower3, copy&paste, Resize 30% and place on top of the flower6.
Apply Dropshadow.
Duplicate, and move underneath flower6 layers.
Apply Dropshadow.
New layer, Arrange – Send to bottom.
Selections – Select All.
Open Tezzas background5, copy.
On new layer, paste into selection.
Selections – Select none.
Layers – Load/Save Mask – Load Mask – MaskWSL_305.
Fit to layer, show all masks, source luminance checked; invert transparency NOT checked.
Merge group.
Resize 80% and use your Point-to-Point Selection Tool, ‘zig-zag’ around the mask (encircle it).
Selections – Invert.
Selections – Modify – Feather 15 and on the mask layer, hit delete once.
Selections – Select none.
New Layer, Send to bottom.
Selections – Select all.
Open Tezzas background10, copy and on new layer, paste into selection.
Selections – Select none.
Layers – Load/Save Mask – Load Mask – MaskWSL_283.
Fit to layer, show all masks, source luminance checked; invert transparency NOT checked.
Merge group.
Optional: resize mask or use your Deformation Tool, if necessary, to tweek your mask layers to your liking and lower opacity if you want (I lowered mine to 78%).
Now, the next step is to add any further text, copyright information and your watermark to the graphic.
Feel free to merge all layers visible and then resize to your liking or crop the image.
If you prefer a transparent background, save your tag in PNG format.
Otherwise, if you select the JPG, it will automatically add a white background.
Should you care for a different colored background:
New layer, arrange, send to bottom, and floodfill with your color of choice.
I hope you enjoyed this tutorial!
XOXOXO,
Dani


Thanks for the tutorial hun, Ive posted this on my blog with a link to you. Thanks for using my kit♥♥
ReplyDelete