Monday, May 23, 2011

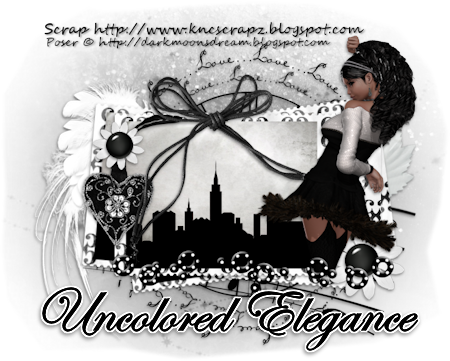
New Tut - Uncolored Elegance


Uncolored Elegance

This tutorial is my own creation and based on my own ideas. Any and all similarities with any other tutorial is purely coincidental.
Please do not upload to or offer this tutorial on any other site without asking me first. Thank you.
Material you will need:

PaintShopPro – I’m using PSP X2, but you should be able to follow the tutorial in any version.
A scrap kit – I used the gorgeous kit Uncolored Elegance by Knc Scrapz, which you can purchase here. This fabulous kit is also available in Full size.
A font of your choice.
A tube of your choice.
1 mask –I used HorsePlay’s Pasture Mask 4 and 27 which you can download from Beverly’s  blog here.
No filters required.

Now, let’s get started. It might be helpful if you choose the elements you wish to use beforehand, and open them up in PSP prior to starting the tutorial. That way, you have them handy when following each step.
Also, you don’t have to slavishly follow each positioning nor setting – play and experiment a bit, especially if you use different elements.
If you are unsure how to position an element, refer back to my sample tag.
I do assume you have at least some to moderate experience and understanding of PSP.
The DropShadow throughout the tutorial remains the same: V/H 2/-1 O/B 43/5.84.
Resizing throughout the tutorial is done with “Resize all Layers” NOT checked.

Open new image, 800 x 800.
Open frame1, copy&paste.
Magic Wand, click inside the frame, Selections – Modify – Expand by 2.
Open pp10, copy.
New layer, under frame layer, paste into selection, Selections – Select none.
Open skyline, copy&paste, Resize 25%, under frame layer, position to liking.
On frame layer, merge visible (frame, skyline, paper).
Duplicate twice.
First duplicate, Free Rotate – Right – 8 degrees, move under original frame layer, a bit to the right and top.
Second duplicate, Free Rotate – Left – 5 degrees, move under original frame layer, a bit to the right and up.
Apply Dropshadow to each frame.
Open element6, copy&paste, Resize 42%, position on top of frame to liking.
Apply Dropshadow.
Open element8, copy&paste, Resize 48%, move to the bottom of the frame.
Open button1, copy&paste. Duplicate, resize and position to liking.
Apply Dropshadow to each button.
Open flower2, copy&paste, duplicate, resize and position to liking.
Apply Dropshadow to each flower.
Open heart2, copy&paste, Resize 42%, move to the upper left corner, on top of frame layer.
Apply Dropshadow.
Open leaf, copy&paste, Resize 45%, Free Rotate – Right – 25 degrees.
Arrange – Send To Bottom, move to the upper right corner.
Apply Dropshadow.
Open Music, copy&paste, Resize 40%, move to the bottom.
Apply Dropshadow.
Open wing, copy&paste, Resize 65%, Arrange – Send To Bottom, move to the upper left corner.
Open wa1, copy&paste, Resize 70%, Arrange – Send To Bottom.
Paste once more, Resize 65%, Free Rotate – Right – 35 degrees.
Open clock, copy&paste.
Apply Dropshadow if desired.
Open your tube, copy&paste, Resize and position to liking.
Apply Dropshadow.
Open pp4, ccopy&paste, Arrange – Send To Bottom.
Layers – Load/Save Mask – Load Mask from Disk – HorsePlay’s Pastuer Mask 4, Merge Group.
Open pp8, copy&paste.
Layers – Load/Save Mask – Load Mask from Disk – HorsePlay’s Pastuer Mask 27, Merge Group.
On first mask layer, merge down once.


Optional: resize mask or use your Deformation Tool, if necessary, to tweak your mask layers to your liking and/or lower the opacity.

Then, it is time to add any further text, copyright information and watermark to the graphic.

Feel free to merge all layers visible and then resize to your liking or crop the image.
If you prefer a transparent background, save your tag in PNG format.
Otherwise, if you select the JPG, it will automatically add a white background.
Should you care for a different colored background:
New layer, arrange, send to bottom, and floodfill with your color of choice.

I hope you enjoyed this tutorial!

XOXOXO,
Dani

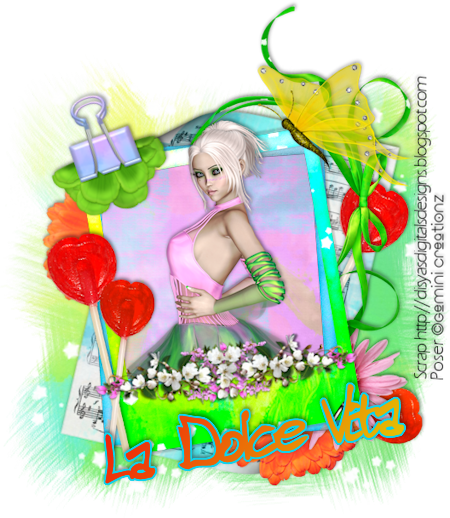
New Tut - La Dolce Vita


La Dolce Vita

This tutorial is my own creation and based on my own ideas. Any and all similarities with any other tutorial is purely coincidental.
Please do not upload to or offer this tutorial on any other site without asking me first. Thank you.
Material you will need:

PaintShopPro – I’m using PSP X2, but you should be able to follow the tutorial in any version.
A scrap kit – I used the fabulous kit La Dolce Vita by Disyas Digital Designs, which you can purchase here. This kit is also available in Full size.
A font of your choice.
A tube of your choice.
1 mask –I used WSL 116, created by Weescotslass, which is included in the material. Check out her blog here for further masks.
No filters required.
You can get the material here.

Now, let’s get started. It might be helpful if you choose the elements you wish to use beforehand, and open them up in PSP prior to starting the tutorial. That way, you have them handy when following each step.
Also, you don’t have to slavishly follow each positioning nor setting – play and experiment a bit, especially if you use different elements.
If you are unsure how to position an element, refer back to my sample tag.
I do assume you have at least some to moderate experience and understanding of PSP.
The DropShadow throughout the tutorial remains the same: V/H -2/-3 O/B 46/6.37.
Resizing throughout the tutorial is done with “Resize all Layers” NOT checked.

Open new image, 800 x 800.
Open Disyas_DV_SFr2, coy&paste.
Apply Dropshadow.
Open Disyas_DV_SFr7, copy&paste.
Open your tube, copy&paste, resize and position to liking inside the second (square) frame.
Apply Dropshadow.
Optional: use your Freehand Selection Tool – Point-to-Point, to erase any parts of the tube you don’t wish to stick out of the frame.
Magic Wand, click inside the second (square) frame, Selections – Modify – Expand by 3.
New layer, move underneath second frame layer.
Open Disyas_DV_P12, copy, on new layer, paste into selection, Selections – Select none.
On second frame layer, merge down twice (frame, tube & paper).
Open Disyas_DV_Border7, copy&paste, Resize 63%, Free Rotate – Left – 7 degrees.
Position on top of frame layers.
Open Disyas_DV_Butterfly3, copy&paste, Resize 75%, position in upper right corner.
Apply Dropshadow.
Open Disyas_DV_El25, copy&paste, position to liking.
Apply Dropshadow.
Open Disyas_DV_Flower9, copy&paste, Resize 55%, duplicate.
Move one towards the lower right corner.
On duplicate, Free Rotate – Left – 25 degrees, move to upper left corner.
Apply Dropshadow to both flowers.
Open Disyas_DV_Flower6, copy&paste, Resize 45%, move to lower right corner, on top of first flower.
Apply Dropshadow.
Open Disyas_DV_El29, copy&paste, Free Rotate – Right – 13 degrees, Arrange – Send To Bottom.
Apply Dropshadow.
Open Disyas_DV_Clip1, copy&paste, Resize 45%, Free Rotate – Left – 20 degrees, Arrange – Bring To Top, move to upper left corner.
Apply Dropshadow.
Open Disyas_DV_P9, copy&paste, Arrange – Send To Bottom.
Layers – Load/Save Mask – Load Mask from Disk – WSL_Mask116, Merge Group.
Repeat.
Optional: resize mask or use your Deformation Tool, if necessary, to tweak your mask layers to your liking and/or lower the opacity (I lowered mine to 60%).

Then, it is time to add any further text, copyright information and watermark to the graphic.

Feel free to merge all layers visible and then resize to your liking or crop the image.
If you prefer a transparent background, save your tag in PNG format.
Otherwise, if you select the JPG, it will automatically add a white background.
Should you care for a different colored background:
New layer, arrange, send to bottom, and floodfill with your color of choice.

I hope you enjoyed this tutorial!

XOXOXO,
Dani
Sunday, May 22, 2011

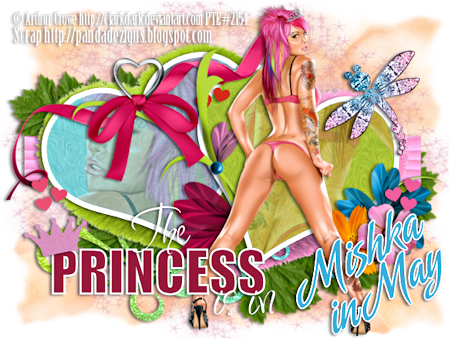
New Tut - Mishka In May


Mishka in May

This tutorial is my own creation and based on my own ideas. Any and all similarities with any other tutorial is purely coincidental.
Please do not upload to or offer this tutorial on any other site without asking me first. Thank you.
Material you will need:

PaintShopPro – I’m using PSP X2, but you should be able to follow the tutorial in any version.
A scrap kit – I used awesome kit Mishka In May by P&A Dezigns, visit her blog here to find a store where you can purchase this great kit.
A font of your choice.
A tube, or several, of your choice. I used Rock Princess by Arthur Crowe. You can purchase the tube at PTE.
2 masks –I used BK 26 and 53, created by Deanna aka Butterfly Kisses. You can download the masks here from her share folder (26 is in Mask Set 6, 53 is in Mask Set 11).
1 tag template – I used Template 18, created by Creative By Nature. You can find it, and many more awesome tag templates here on her blog.
No filters required.

Now, let’s get started. It might be helpful if you choose the elements you wish to use beforehand, and open them up in PSP prior to starting the tutorial. That way, you have them handy when following each step.
Also, you don’t have to slavishly follow each positioning nor setting – play and experiment a bit, especially if you use different elements.
If you are unsure how to position an element, refer back to my sample tag.
I do assume you have at least some to moderate experience and understanding of PSP.
The DropShadow throughout the tutorial remains the same: V/H -2/-3 O/B 46/6.37.
Resizing throughout the tutorial is done with “Resize all Layers” NOT checked.

Open template, duplicate, close original.
Open tube, duplicate, close out original.
Open Paper6, copy.
On template, select the left Heart, Selections – Select all – Float – Defloat.
Paste into selection, Selections – Select none.
Optional: copy&paste your tube (or one of your tubes), resize and position to liking on the left Heart.
With your Magic Wand, on the heart layer, click outside the heart, Selections – Modify - Expand 2.
On tube layer, hit “delete”, Selections – Select none.
Lower opacity.
Open Paper3, copy.
On template, select the right Heart, Selections – Select all – Float – Defloat.
Paste into selection, Selections – Select none.
Open Paper14, copy.
Optional: copy&paste your tube (or one of your tubes), resize and position to liking on the right Heart.
With your Magic Wand, on the heart layer, click outside the heart, Selections – Modify - Expand 2.
On tube layer, hit “delete”, Selections – Select none.
Lower opacity.
Optional: flood fill the heart rims with a color, gradient or pattern (or paper) of choice.
Select the respective heart rim layer, and merge down twice (rim, tube and heart) – repeat for the other heart.
Apply Dropshadow to both hearts.
On template, select the Square (bottom layer of template 18), Selections – Select all – Float – Defloat.
New layer, paste into selection, Selections – Select none.
Delete original square layer.
Apply Dropshadow.
For the little hearts – I chose 3 colors from my tube to flood fill them, but you can, of course use a paper instead too.
Go on each little 3-heart layer, Selections – Select all – Float – Defloat.
New layer, flood fill with your color or gradient – Selections – Select none, delete original hearts layer.
Repeat with each hearts layer.
Apply Dropshadow.
Optional: recolor the Princess wordart if you like or leave it the way it is. I chose to flood fill it with two colors from the tube.
Apply Dropshadow if you like.
Same for the crown – either choose a color or paper (I choose Paper5).
Apply Dropshadow.
Next, copy&paste the elements you’d like to use, resize and position to liking.
Apply Dropshadow.
Open Paper12, copy&paste, Arrange – Send to Bottom.
Layers – Load/Save Mask – Load Mask from Disk – BK_Mask26, Merge Group.
Lower Opacity to about 60% or liking.
Repeat mask.
Open Paper7, copy&paste.
Layers – Load/Save Mask – Load Mask from Disk – BK_Mask53, Merge Group.
Lower Opacity to about 35% or liking.
Merge down (both mask layers).
Optional: I lowered Opacity once more to 65%.
Open your tube (or your main tube), copy&paste, Resize and position to liking.
Apply Dropshadow to each element.

Optional: resize mask or use your Deformation Tool, if necessary, to tweak your mask layers to your liking and/or lower the opacity.
Now, the next step is to add any further text, copyright information and your watermark to the graphic.
Feel free to merge all layers visible and then resize to your liking or crop the image.
If you prefer a transparent background, save your tag in PNG format.
Otherwise, if you select the JPG, it will automatically add a white background.
Should you care for a different colored background:
New layer, arrange, send to bottom, and flood fill with your color of choice.

I hope you enjoyed this tutorial!

XOXOXO,
Dani