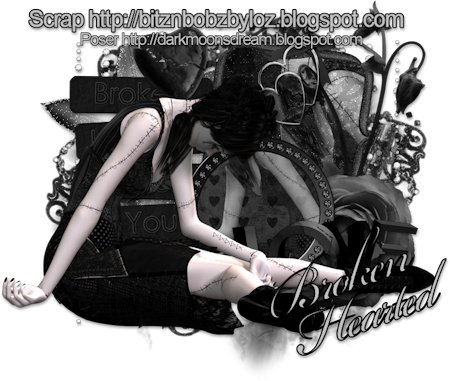
Broken Hearted
This tutorial is my own creation and based on my own ideas. Any and all similarities with any other tutorial is purely coincidental.
Please do not upload to or offer this tutorial on any other site without asking me first. Thank you.
Material you will need:
PaintshopPro – I’m using PSP X2, but you should be able to follow the tutorial in any version.
A scrap kit – I used the awesome kit Broken by Laura’s Designz , which you can purchase here at Scraps With Attitude.
A font of your choice.
A tube of your choice.
1 mask –I used WSL 321 and 333, created by Weescotslass, which is included in the material. Check out her blog here for further masks.
No filters required.
Now, let’s get started. It might be helpful if you choose the elements you wish to use beforehand, and open them up in PSP prior to starting the tutorial. That way, you have them handy when following each step.
Also, you don’t have to slavishly follow each positioning nor setting – play and experiment a bit, especially if you use different elements.
If you are unsure how to position an element, refer back to my sample tag.
I do assume you have at least some to moderate experience and understanding of PSP.
The DropShadow throughout the tutorial remains the same: V/H 3/1 O/B 40/6.77.
Resizing throughout the tutorial is done with “Resize all Layers” NOT checked.
Open new image, 850 x 850.
Open LD_B_Element 41, copy&paste, resize 50%, move to the left.
Apply Dropshadow.
Open LD_B_Element 12, copy&paste, resize 50%, move the top and a bit to the right.
Open your tube, copy&paste, move underneath frame layer, position to liking, resize to liking, mirror if desired.
Magic Wand, on the frame layer, click inside the frame, Selections – Modify – Expand 1, Invert.
On the tube layer, hit ‘delete’, Selections – Select none.
New layer, move underneath tube layer.
Open LD_B_Paper 6, copy, on new layer, copy&paste, resize if you like.
Magic Wand, on frame layer, click inside frame, Selections – Modify – Expand 1, Invert.
On paper layer, hit ‘delete’, Selections – Select none.
Back on the tube layer, lower opacity to 60%, Luminance (Legacy).
Close all layers except frame, tube and paper layer.
On frame layer, merge down twice (frame, tube & paper layer).
Apply Dropshadow
Open LD_B_Element 44, copy&paste, resize 40%, move a bit towards the bottom and a bit more to the left than first frame.
Open tube, copy&paste, move underneath second frame layer, resize and position to liking.
Open LD_B_Paper 1, copy&paste, move underneath second tube layer, resize 50%.
Magic Wand, click inside the second frame, Selections – Modify – Expand 1, Invert.
On second tube layer, hit ‘delete’, repeat on second paper layer.
Selections – Select none, on second frame layer, merge down twice (second frame, tube & paper).
Apply Dropshadow.
Open LD_B_Element 4, copy&paste, Arrange – move to top, Resize 30%, move to the bottom right.
Apply Dropshadow.
Open LD_B_Element 5, copy&paste, Resize 65%, move between first and second frame layers.
Apply Dropshadow.
Open LD_B_Element 49, copy&paste, resize 40%, Arrange – move to top, position on top of the first frame layer, a bit to the left.
Apply Dropshadow.
Open LD_B_Element 61, copy&paste, Resize 73%, Arrange – Send to Bottom.
Apply Dropshadow.
Open LD_B_Element 30, copy&paste, Resize 45%, move between first and second frame layers.
Apply Dropshadow.
Open LD_B_Element 35, copy&paste, Resize 45%, Free Rotate – Right – 50 degrees, move underneath rose layer to the right.
Apply Dropshadow.
Open LD_B_Element 34, Resize 75%, move underneath frame layers, to the right.
Apply Dropshadow.
Open LD_B_Element 14, copy&paste, Resize 85%, move underneath the two frame layers, to the upper left.
Apply Dropshadow.
New layer, Arrange – Send to Bottom, Selections – Select all.
Open LD_B_Paper 3, copy and on new layer, paste into selection.
Layers – Load/Save Mask – Load Mask from Disk – WSL_Mask333.
Merge Group, Selections – Select none.
New layer, move on top of bottom layer, Selections – Select all.
Open LD_B_Paper 5, copy, paste into selection
Layers – Load/Save Mask – Load Mask from Disk – WSL_Mask321.
Merge Group, Selections – Select none.
Optional: resize mask or use your Deformation Tool, if necessary, to tweek your mask layers to your liking and/or lower the opacity.
Now, the next step is to add any further text, copyright information and your watermark to the graphic.
Feel free to merge all layers visible and then resize to your liking or crop the image.
If you prefer a transparent background, save your tag in PNG format.
Otherwise, if you select the JPG, it will automatically add a white background.
Should you care for a different colored background:
New layer, arrange, send to bottom, and floodfill with your color of choice.
Don’t forget to make sure you resize your tag accordingly if need be.
I hope you enjoyed this tutorial!
XOXOXO,
Dani


No comments:
Post a Comment