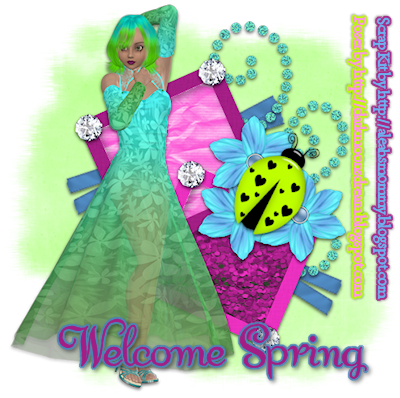
Welcome Spring
This tutorial is my own creation and based on my own ideas. Any and all similarities with any other tutorial is purely coincidental.
Please do not upload to or offer this tutorial on any other site without asking me first. Thank you.
Material you will need:
PaintshopPro – I’m using PSP X2, but you should be able to follow the tutorial in any version.
A scrap kit – I used the cute and colorful kit Welcome Spring by Aleah’s Mommy Designs, which you can purchase here.
A tube of your choice or the one supplied, which was made by me.
A font of your choice.
A mask –I used WSL 223, created by Weescotslass, which is included in the material. Check out her blog here for further masks.
No filters required.
You can get the material here.
Now, let’s get started. It might be helpful if you choose the elements you wish to use beforehand, and open them up in PSP prior to starting the tutorial. That way, you have them handy when following each step.
Also, you don’t have to slavishly follow each positioning nor setting – play and experiment a bit, especially if you use different elements.
If you are unsure how to position an element, refer back to my sample tag.
I do assume you have at least some to moderate experience and understanding of PSP.
The DropShadow throughout the tutorial remains the same: V/H 2/0 O/B 60/5.85.
Resizing throughout the tutorial is done with “Resize all Layers” NOT checked.
Open a new image, 550 x 550, transparent background.
Open ClusterFrame sq2, copy&paste, Resize by 60%.
With your Magic Wand, click inside the upper frame plus the center part (where the frame’s overlap).
Selections – Modify – Expand by 2; New Layer.
Open paper 7, copy.
On the new layer, paste into selection.
Selections – Select none.
With your Magic Wand, click inside the bottom frame.
Selections – Modify – Expand by 2; New Layer.
Open Glitter Tile 4, copy.
On your new layer, paste into selection.
Selections – Select none.
With your Magic Wand, now click inside the upper, the center, and the bottom part of the frame.
New layer and highlight that layer.
Effects – 3DEffects – Cut Out – V/H 3/4 O/B 35/12.00, color black.
Highlight the frame layer, and merge down three times (frame, cutout, and the 2 paper layers).
Apply Dropshadow.
Open Glitter Doodle 2, copy&paste as new layer, Resize 85%.
Move underneath frame layer, a bit up and to the right of the frame.
Apply Dropshadow.
Open Ladybug18, copy&paste, Resize 35%, Move on top of the frame.
Free Rotate – Right – 35 degrees.
Apply Dropshadow.
Open Basic Flower 2, copy&paste, Resize 30%, Move underneath Ladybug and a bit to the left and bottom of it.
Duplicate twice.
First copy: mirror, and move to the right and slightly lower than first flower underneath the ladybug.
Second copy: flip, and move it a bit to the top of the ladybug.
Apply a Dropshadow to all three flowers.
Open Gem 1, copy&paste Resize 13%, Move underneath flowers, but on top of the frame layer.
Apply Dropshadow.
Duplicate as often as you desire – I copied 3 times, and then placed one gem on the corners of the frame.
Open Ribbon 2, copy&paste, Resize 50%, Duplicate once.
Original: Free Rotate – Left – 20 degrees; move up into center of upper frame, apply Dropshadow.
Copy: Mirror, Free Rotate – Right – 25 degrees; move into the center of the lower frame, apply Dropshadow.
Open your tube, copy&paste. If your using the tube supplied, I resized it by 40% - but feel free to resize to your liking.
Position on top of the frame, to the left side of the frame.
Apply Dropshadow.
On your bottom layer, which should be empty (if not, New Layer, Send to Bottom):
Selections – Select all.
Open paper 9, copy.
Back on your bottom layer, paste into selection.
Selections – Select none.
Layers – Load/Save Mask – Load Mask – MaskWSL_223.
Fit to layer, show all masks, source luminance checked; invert transparency NOT checked.
Merge group.
Optional: resize mask and/or lower opacity of mask layer. I didn’t resize, but lowered the opacity to 65%.
Now, the next step is to add any further text, copyright information and your watermark to the graphic.
Feel free to merge all layers visible and then resize to your liking or crop the image.
If you prefer a transparent background, save your tag in PNG format.
Otherwise, if you select the JPG, it will automatically add a white background.
Should you care for a different colored background:
New layer, arrange, send to bottom, and floodfill with your color of choice.
I hope you enjoyed this tutorial!
XOXOXO,
Dani


No comments:
Post a Comment