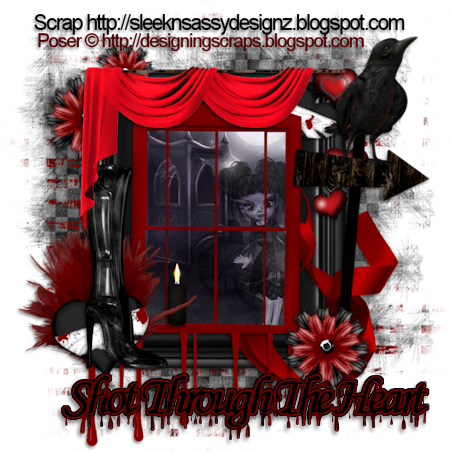
Shot Through The Heart
This tutorial is my own creation and based on my own ideas. Any and all similarities with any other tutorial is purely coincidental.
Please do not upload to or offer this tutorial on any other site without asking me first. Thank you.
Material you will need:
PaintShopPro – I’m using PSP X2, but you should be able to follow the tutorial in any version.
A scrap kit – I used the fabulous kit Shot Through The Heart by Sleek N Sassy Designz , which you can purchase here.
A font of your choice.
A tube of your choice.
2 mask –I used WSL 297 and 301, created by Weescotslass, which are included in the material. Check out her blog here for further masks.
No filters required.
Now, let’s get started. It might be helpful if you choose the elements you wish to use beforehand, and open them up in PSP prior to starting the tutorial. That way, you have them handy when following each step.
Also, you don’t have to slavishly follow each positioning nor setting – play and experiment a bit, especially if you use different elements.
If you are unsure how to position an element, refer back to my sample tag.
I do assume you have at least some to moderate experience and understanding of PSP.
The DropShadow throughout the tutorial remains the same: V/H 3/-2 O/B 47/5.97.
Resizing throughout the tutorial is done with “Resize all Layers” NOT checked.
Open new image 800 x 800.
Open window, copy&paste, resize 70%.
Open Paper1, copy&paste, move below winow layer, resize 45%.
With your Magic Wand, on window layer, click outside window – Selections – Modify – Expand 2.
On Paper1 layer, hit “delete”, Selections – Select none.
Open your tube, copy&paste, move below window layer, resize and position to liking.
Optional: I change layer blend mode to “Luminance”, Opacity 65%.
With your Magic Wand, on window layer, click outside window – Selections – Modify – Expand 2.
On tube layer, hit “delete”, Selections – Select none.
Open Drips2, copy&paste, Resize 65%, move underneath window layer, towards the bottom.
Layers – Merge visible.
Apply Dropshadow.
Open Candle, Resize 17%, move to the lower left of the window.
Apply Dropshadow.
Open Frame4, copy&paste, Resize 75%, move underneath window layer.
Open Bloody_Heart, copy&paste, Resize 35%, duplicate.
First heart, Free Rotate – Left – 7 degrees, position lower left corner on top of window layer.
Apply Dropshadow.
Second heart, Resize 70%, Free Rotate – Right – 35 degrees, move to upper right corner, underneath window layer.
Apply Dropshadow.
Open Steampunk4, copy&paste, Resize 45%, move to the upper right corner, underneath second heart.
Apply Dropshadow.
Open Feather, copy&paste, Resize 55%, move underneath first heart layer.
Apply Dropshadow.
Open Arrow, copy&paste, Resize 65%, Free Rotate – Right – 5 degrees, move to the right side, on top of window layer.
Apply Dropshadow.
Open Crow, copy&paste, Resize 55%, Free Rotate – Right – 3 degrees, move to the right, on top of arrow.
Apply Dropshadow.
Open Curtain, copy&paste, Resize 53%, position to liking.
Apply Dropshadow.
Open Flower, copy&paste. Resize and position to liking, duplicate as many times you like.
Apply Dropshadow to all flowers.
Open Boot, copy&paste, Resize 52%, move underneath curtain layer if desired.
Apply Dropshadow.
Open Paper6, copy&paste, Arrange – Send to bottom.
Layers – Load/Save Mask – Load Mask from Disk – WSL_Mask297, Merge Group.
Open Paper3, copy&paste, on top of previous paper layer.
Layers – Load/Save Mask – Load Mask from Disk – WSL_Mask301, Merge Group.
Optional: resize mask or use your Deformation Tool, if necessary, to tweek your mask layers to your liking and/or lower the opacity.
Optional: add anything else to liking – another tube, elements, effects.
Don’t forget to add any text/names, of course, copyright information and your watermark to the tag.
Feel free to merge all layers visible and then resize to your liking or crop the image.
If you prefer a transparent background, save your tag in PNG format.
Otherwise, if you select the JPG, it will automatically add a white background.
Should you care for a different colored background:
New layer, arrange, send to bottom, and floodfill with your color of choice.
I hope you enjoyed this tutorial!
XOXOXO,
Dani


Thanks so much Dani! I've posted this on my blog. :-)
ReplyDeleteJen