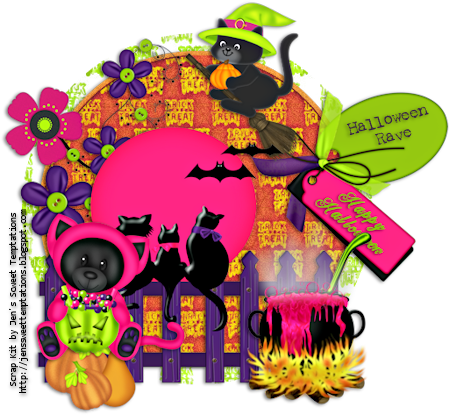
Halloween Rave
This tutorial is my own creation and based on my own ideas. Any and all similarities with any other tutorial is purely coincidental.
Please do not upload to or offer this tutorial on any other site without asking me first. Thank you.
Material you will need:
PaintShopPro – I’m using PSP X2, but you should be able to follow the tutorial in any version.
A scrap kit – I used the awesome kit Halloween Rave by Jen’s Sweet Temptations, which you can purchase here.
A font of your choice.
Plugins – Xero - Pastellise.
Now, let’s get started. It might be helpful if you choose the elements you wish to use beforehand, and open them up in PSP prior to starting the tutorial. That way, you have them handy when following each step.
Also, you don’t have to slavishly follow each positioning nor setting – play and experiment a bit, especially if you use different elements.
If you are unsure how to position an element, refer back to my sample tag.
I do assume you have at least some to moderate experience and understanding of PSP.
The Drop Shadow throughout the tutorial remains the same: V/H 1/-2 O/B 50/5.35.
Resizing throughout the tutorial is done with “Resize all Layers” NOT checked.
Open new image, 600 x 600 px.
Open Paper9, copy.
Selection Tool – Circle.
Start in the center of your canvas and draw a circle about 400 in size.
Paste into Selection.
Selections – Select none.
Layers – Load/Save Mask – Load Mask from Disk – AS_Halloween mask4, Merge Group
Optional: resize mask or use your Deformation Tool, if necessary, to tweak your mask layers to your liking and/or lower the opacity.
New layer.
Open Paper6, copy.
Selection Tool – Circle.
Start in canvas center and draw a circle about 350 in size.
Paste into Selections.
Keep selection.
Selections – Expand 2.
Pick a color of choice.
New layer, underneath last paper layer.
Fill with color.
Add/Remove Noise – Add Noise – Uniform, 10, Monochrome checked.
Selections – Select none.
Duplicate mask layer.
Arrange – Bring to Top.
Resize 87%.
On second mask layer.
Merge down once.
Duplicate merged layer.
On bottom copy of merged layer.
Selections – Float/Defloat.
Plugins – Xero – Pastellise.
Selections – Select none.
Layer Mode – Multiply.
Layer Opacity – 55%.
On top copy of merged layer.
Layer Mode – Overly.
Layer Opacity – 75%.
Open Flower1.
Copy & paste.
Mirror.
Resize 45% and position to liking.
Open Tag.
Copy & paste.
Resize 45% and position to liking.
Open Cat.
Copy & paste.
Resize 40% and position to liking.
Open Moonlights.
Copy & paste.
Resize 70% and position to liking.
Open Bear.
Copy & paste.
Resize 40% and position to liking.
Open Cauldron.
Copy & paste,
Resize 45% and position to liking.
Apply Dropshadow as desired.
Then, it is time to add any further text, copyright information and watermark to the graphic.
Feel free to merge all layers visible and then resize to your liking or crop the image.
If you prefer a transparent background, save your tag in PNG format.
Otherwise, if you select the JPG, it will automatically add a white background.
Should you care for a different colored background:
New layer, arrange, send to bottom, and floodfill with your color of choice.
I hope you enjoyed this tutorial!
XOXOXO,
Dani


I Just Love Your Tutorials
ReplyDelete