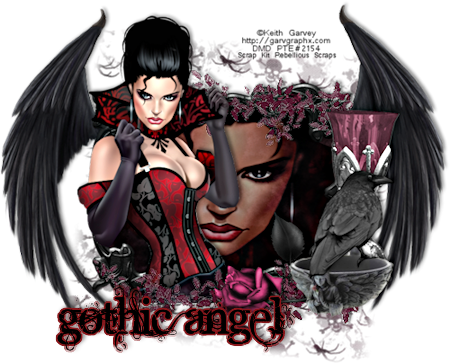
Gothic Angel
This tutorial is my own creation and based on my own ideas. Any and all similarities with any other tutorial is purely coincidental.
Please do not upload to or offer this tutorial on any other site without asking me first. Thank you.
Material you will need:
PaintShopPro – I’m using PSP X2, but you should be able to follow the tutorial in any version.
A scrap kit – I used the fabulous kit Gothic Angel by Rebellious Scraps, which you can purchase here.
A font of your choice.
A tube of your choice. I used Vamp Glamour by Keith Garvey, which you can purchase at PSP Tubes Emporium.
Plugins/Filters used – Xero Moonlight
Now, let’s get started. It might be helpful if you choose the elements you wish to use beforehand, and open them up in PSP prior to starting the tutorial. That way, you have them handy when following each step.
Also, you don’t have to slavishly follow each positioning nor setting – play and experiment a bit, especially if you use different elements.
If you are unsure how to position an element, refer back to my sample tag.
I do assume you have at least some to moderate experience and understanding of PSP.
The DropShadow throughout the tutorial remains the same: V/H -2/3 O/B 41/5.75.
Resizing throughout the tutorial is done with “Resize all Layers” NOT checked.
Open new image 600 x 600 px.
Open frame3, c/p, resize 55%.
Open paper11, copy.
Magic Wand, click inside frame, Selections – Expand 3, Paste into Selection, keep selection.
Open your tube, c/p, under frame layer, position to liking.
Selections – Invert, hit “Delete”, Deselect.
Change layer mode to “Hard light”, Merge visible.
Duplicate, Selections – Float/Defloat.
Plugins – Xero – Moonlight – default settings.
Optional: change layer mode and/or opacity if desired.
Open wing 1 and 2, resize both 70%, move underneath frame layer, to the left and right respectively.
Open leaves1, c/p, Free Rotate – Left – 90 degrees, lower edge of frame.
Optional: resize or erase parts of the ends.
Duplicate, flip, re-position if desired.
Open rose, c/p, resize 40%, lower right.
Open cup1, c/p, resize 55%, right side of the frame.
Open bowl, c/p, resize 35%, lower right.
Open crow, c/p, resize 60%, lower right (on top of bowl).
Open your tube, c/p, resize and position to taste.
Apply Dropshadow as desired.
New layer, Arrange – Send to Bottom, Selections – Select all.
Open paper7, copy, on new layer, Paste into selection, Deselect.
Layers – Load/Save Mask – Load Mask from Disk – AS_Halloween mask5, Merge Group.
Optional: resize mask or use your Deformation Tool, if necessary, to tweak your mask layers to your liking and/or lower the opacity.
Then, it is time to add any further text, copyright information and watermark to the graphic.
Feel free to merge all layers visible and then resize to your liking or crop the image.
If you prefer a transparent background, save your tag in PNG format.
Otherwise, if you select the JPG, it will automatically add a white background.
Should you care for a different colored background:
New layer, arrange, send to bottom, and floodfill with your color of choice.
I hope you enjoyed this tutorial!
XOXOXO,
Dani


No comments:
Post a Comment