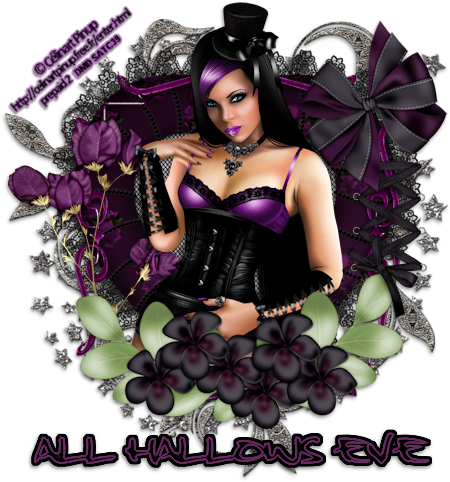
All Hallow’s Eve
This tutorial is my own creation and based on my own ideas. Any and all similarities with any other tutorial is purely coincidental.
Please do not upload to or offer this tutorial on any other site without asking me first. Thank you.
Material you will need:
PaintShopPro – I’m using PSP X2, but you should be able to follow the tutorial in any version.
A scrap kit – I used the fabulous kit All Hallow’s Eve by JTsDesigns, which you can purchase at Enchanted Dreams Boutique.
A font of your choice.
A tube of your choice. I used a commission tube by Célinart Pinup. You can find her tubes at Scraps And The City.
No filters required.
Now, let’s get started. It might be helpful if you choose the elements you wish to use beforehand, and open them up in PSP prior to starting the tutorial. That way, you have them handy when following each step.
Also, you don’t have to slavishly follow each positioning nor setting – play and experiment a bit, especially if you use different elements.
If you are unsure how to position an element, refer back to my sample tag.
I do assume you have at least some to moderate experience and understanding of PSP.
The Drop Shadow throughout the tutorial remains the same: V/H 2/-1 O/B 44/5.44.
Resizing throughout the tutorial is done with “Resize all Layers” NOT checked.
Open new image.
600 x 600, 72 dpi.
Open JTsDesignsAHE_CircleStarzTS.
Copy & paste.
Resize 85%.
Open JTsDesignsAHE_ScrollHeartTS, 85%.
Copy & paste.
Resize 85%.
Open JTsDesignsAHE_Heart1TS.
Copy & paste.
Resize 55%.
Open JTsDesignsAHE_Frame3TS.
Copy & paste.
Resize 65%.
Open JTsDesignsAHE_BougainvilleTS.
Copy & paste.
Resize 35%.
Move to the left.
Open your tube.
Copy & paste.
Resize and position to liking.
Open JTsDesignsAHE_Flowers2TS.
Copy & paste.
Resize 45%.
Move to the bottom.
Open JTsDesignsAHE_Lace2TS.
Copy & paste.
Resize 25%.
Move to the right.
Open JTsDesignsAHE_Bow1TS.
Copy & paste.
Resize 35%.
Move to the top right.
Optional:
You may have to erase some parts of the tube if it’s extending past the flowers.
Move the stars and scroll heart a little bit.
Apply Drop shadow as desired.
Then, it is time to add any further text, copyright information and watermark to the graphic.
Feel free to merge all layers visible and then resize to your liking or crop the image.
If you prefer a transparent background, save your tag in PNG format.
Otherwise, if you select the JPG, it will automatically add a white background.
Should you care for a different colored background:
New layer, arrange, send to bottom, and floodfill with your color of choice.
I hope you enjoyed this tutorial!
XOXOXO,
Dani


No comments:
Post a Comment