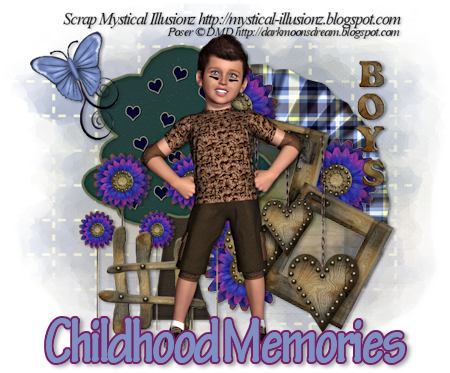
Childhood Memories
This tutorial is my own creation and based on my own ideas. Any and all similarities with any other tutorial is purely coincidental.
Please do not upload to or offer this tutorial on any other site without asking me first. Thank you.
Material you will need:
PaintShopPro – I’m using PSP X2, but you should be able to follow the tutorial in any version.
A scrap kit – I used the beautiful kit Childhood Memories by Mystical Illusionz , check her blog here to find a store she sells in.
A font of your choice.
A tube of your choice.
2 masks – I used HorsePlay’s Pasture 17 and 25, created by Beverly aka HorsePlay’s Pasture, which you can download from her blog here.
No filters required.
Now, let’s get started. It might be helpful if you choose the elements you wish to use beforehand, and open them up in PSP prior to starting the tutorial. That way, you have them handy when following each step.
Also, you don’t have to slavishly follow each positioning nor setting – play and experiment a bit, especially if you use different elements.
If you are unsure how to position an element, refer back to my sample tag.
I do assume you have at least some to moderate experience and understanding of PSP.
The DropShadow throughout the tutorial remains the same: V/H 2/3 O/B 34/5.84.
Resizing throughout the tutorial is done with “Resize all Layers” NOT checked.
Open a new image, 800 x 800.
Open ele29, copy&paste, Resize 45%, Free Rotate – Right – 19 degrees.
Open pp03, copy.
With your Magic Wand, click inside both frames, Selections – Modify – Expand 2.
On bottom layer, Paste into Selection (keep selection).
New layer, Cutout – 4/4 25/10.15, Selections – Select None, Merge visible.
Apply Dropshadow.
Open ele42, copy&paste, Resize 50%, move to the right side.
Apply Dropshadow.
Open ele50, copy&paste, on top of frame layer.
Apply Dropshadow.
Open ele31, copy&paste, Resize 40%, move to the lower left corner.
Apply Dropshadow.
Open ele14, copy&paste, Resize 65%, Arrange – Send To Bottom, Mirror, move to the upper right corner.
Apply Dropshadow.
Open ele35, copy&paste Resize 45%, move underneath fence layer, to the bottom left.
Apply Dropshadow.
Open ele15, copy&paste, Resize 35%, move on top of tree, in upper left corner.
Apply Dropshadow.
Open ele38, copy&paste, Resize 50%, move on top of frame.
Apply Dropshadow.
Open ele32, copy&paste, Resize 25%, move underneath frame layer, duplicate twice.
First copy – upper right edge of frame; second copy towards the lower left; third copy to the upper left corner.
Apply Dropshadow to all three.
Open pp05, copy&paste.
Layers – Load/Save Mask – Load Mask from Disk – HorsePlay’s Pasture 17, Merge Group.
Open pp03, copy&paste,
Layers – Load/Save Mask – Load Mask from Disk – HorsePlay’s Pasture 25, Merge Group.
Optional: merge both mask layers, and lower opacity to 65%.
Optional: resize mask or use your Deformation Tool, if necessary, to tweak your mask layers to your liking and/or lower the opacity.
Then, it is time to add any further text, copyright information and watermark to the graphic.
Feel free to merge all layers visible and then resize to your liking or crop the image.
If you prefer a transparent background, save your tag in PNG format.
Otherwise, if you select the JPG, it will automatically add a white background.
Should you care for a different colored background:
New layer, arrange, send to bottom, and floodfill with your color of choice.
I hope you enjoyed this tutorial!
XOXOXO,
Dani


No comments:
Post a Comment