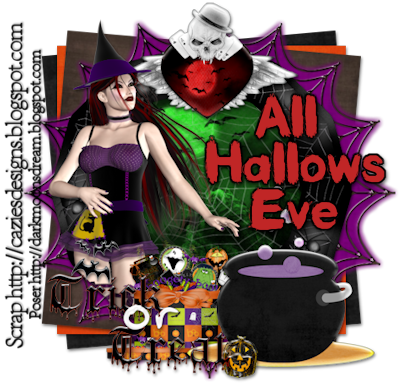
All Hallows Eve
This tutorial is my own creation and based on my own ideas. Any and all similarities with any other tutorial is purely coincidental.
Please do not upload to or offer this tutorial on any other site without asking me first. Thank you.
Material you will need:
PaintshopPro – I’m using PSP X2, but you should be able to follow the tutorial in any version.
A scrap kit – I used the wonderful kit All Hallows Eve by Cazie's Designs, which you can purchase here.
A font of your choice.
A tube of your choice.
No filters required.
Now, let’s get started. It might be helpful if you choose the elements you wish to use beforehand, and open them up in PSP prior to starting the tutorial. That way, you have them handy when following each step.
Also, you don’t have to slavishly follow each positioning nor setting – play and experiment a bit, especially if you use different elements.
If you are unsure how to position an element, refer back to my sample tag.
I do assume you have at least some to moderate experience and understanding of PSP.
The DropShadow throughout the tutorial remains the same: V/H 2/1 O/B 55/5.15.
Resizing throughout the tutorial is done with “Resize all Layers” NOT checked.
Open a new image, 600x600.
Open Cazie_All Hallows eve_frame02, copy & paste, 20%.
Open All_Hallows_eve_Paper5, copy.
With your Selection Tool, Point-to-Point, click around the center of the frame (try to stay fairly close to the inside edge).
New Layer, move underneath frame, layer, Paste into Selection, Selections – Select none, Merge visibly.
Apply Dropshadow.
Open Cazie_All Hallows eve_web, copy&paste, Resize 55%, move underneath frame layer.
Open All_Hallows_eve_Paper13, copy.
New layer, Arrange – Send to Bottom. Selections – Select all, Paste into Selection, Selections – Select none.
With your Magic Wand, click outside of the web, Selections – Invert, Selections – Modify – Expand by 3, Invert, Selections – Feather – 20, back to your paper layer and hit delete as many times as you wish, Selections – Select none.
Open Cazie_All Hallows eve_giftbox, copy&paste, Resize 10%, move to the bottom, and slightly to the left side of the frame.
Apply Dropshadow.
Open Cazie_All Hallows eve_caldron, copy&paste, Resize 13%, move to the bottom righthand corner of the frame.
Apply Dropshadow.
Optional: I erased part of the bottom of the candleholder.
Open Cazie_All Hallows eve_WingedSkull, copy&paste, Resize 45%, move to the top of the frame, somewhat centered.
Apply Dropshadow.
Open tube of choice, copy&paste, Resize and position to liking – optional: depending on what tube you use, erase part of the tube that extends beyond frame edges.
Apply Dropshadow.
Open Cazie_All Hallows eve_word art 3, copy&paste, Resize to liking, and position to the bottom left.
Apply Dropshadow.
3 New layers.
On the very bottom one, Selections – Select All.
Open All_Hallows_Eve_Paper10, copy, on bottom layer, Paste into Selection (keep selection!).
Open All_Hallows_Eve_Paper12, copy, one layer above bottom layer, Paste into Selection (keep selection!).
Open All_Hallows_Eve_Paper11, copy, third new layer (top of the 3 new layers we created), Paste into Selection, Selections – Select none.
Bottom layer, Resize 58%, Free Rotate – Left – 5 degrees, Apply Dropshadow.
Middle layer, Resize 57%, Apply Dropshadow.
Top layer, Resize 58%, Free Rotate – Right – 5 degrees, Apply Dropshadow.
Now, the next step is to add any further text, copyright information and your watermark to the graphic.
Feel free to merge all layers visible and then resize to your liking or crop the image.
If you prefer a transparent background, save your tag in PNG format.
Otherwise, if you select the JPG, it will automatically add a white background.
Should you care for a different colored background:
New layer, arrange, send to bottom, and floodfill with your color of choice.
I hope you enjoyed this tutorial!
XOXOXO,
Dani


No comments:
Post a Comment