Tuesday, October 25, 2011

Too Cute To Spook


Too Cute To Spook


This tutorial is my own creation and based on my own ideas. Any and all similarities with any other tutorial is purely coincidental.
Please do not upload to or offer this tutorial on any other site without asking me first. Thank you.
Material you will need:

PaintShopPro – I’m using PSP X2, but you should be able to follow the tutorial in any version.
A scrap kit – I used the fabulous kit 2 Cute 2 Spook by Tasha’s Playground. You can find a list of stores she sells in on her blog here.
A font of your choice.
A tube of your choice.
No filters required.

Now, let’s get started. It might be helpful if you choose the elements you wish to use beforehand, and open them up in PSP prior to starting the tutorial. That way, you have them handy when following each step.
Also, you don’t have to slavishly follow each positioning nor setting – play and experiment a bit, especially if you use different elements.
If you are unsure how to position an element, refer back to my sample tag.
I do assume you have at least some to moderate experience and understanding of PSP.
The Drop Shadow throughout the tutorial remains the same: V/H 2/3 O/B 55/5.20.
Resizing throughout the tutorial is done with “Resize all Layers” NOT checked.

Open new image 600 x 600.

Open frame 3.
Copy & paste.
Resize 50%.

Open paper7.
Copy.

On frame layer.
Magic Wand.
Click inside frame.
Selections – Modify – Expand by 2.
Bottom layer.
(ought to be empty, if not
New Layer)
Paste into Selection.
Selections – Select none.
Merge visible.
Open Mesh.
Copy & paste.
Resize 55%.
Below frame layer.
Duplicate twice.
Position to liking.
Merge all three mesh layers.

Open House 3.
Copy & paste.
Resize 65%.
Position to the right.
(Underneath frame layer)

Open bats.
Copy & paste.
On top of frame layer.
Resize 25%.
Upper right.

Star2.
Copy & paste.
Resize 25%.
To the right.

Open Bow5.
Copy & paste.
Resize 55%.
Upper left.

Open Ribbon.
Copy & paste.
Resize 35%.
Under bow layer.
Position left.

Open Brad4.
Copy & paste.
Resize 25%.
On top of bow layer.
Center on bow.

Open Web2.
Copy & paste.
Resize 40%.
To the right, a bit towards the top.

Open Cauldron.
Copy & paste.
Resize 40%.
To the lower right.

Open Pumpkin.
Resize 35%.
To the lower right.
Underneath cauldron layer.

Duplicate pumpkin.
Resize 75%.
On top of pumpkin layer.
A bit to the right.

Open tube.
Copy & paste.
Resize & position to liking.

Apply Drop shadow as desired.

Then, it is time to add any further text, copyright information and watermark to the graphic.

Feel free to merge all layers visible and then resize to your liking or crop the image.
If you prefer a transparent background, save your tag in PNG format.
Otherwise, if you select the JPG, it will automatically add a white background.
Should you care for a different colored background:
New layer, arrange, send to bottom, and floodfill with your color of choice.

I hope you enjoyed this tutorial!

XOXOXO,
Dani

Sunday, October 16, 2011

2 Tags - Naughty Pumpkin

Made 2 tags using Treasures by Terry's awesome kit Naughty Pumpkin, which you can purchase at The Scrappin Divaz Designz.

Thank you for looking!

XOXOXO,
Dani

Saturday, October 15, 2011

Tut - Peaches N Pink

Peaches N Pink


This tutorial is my own creation and based on my own ideas. Any and all similarities with any other tutorial is purely coincidental.
Please do not upload to or offer this tutorial on any other site without asking me first. Thank you.
Material you will need:

PaintShopPro – I’m using PSP X2, but you should be able to follow the tutorial in any version.
A scrap kit – I used the beautiful kit Peaches N Pink by Grand Designs Posers (this is a full size kit), which you can purchase here.
A font of your choice.
A tube of your choice. I used the beautiful Poser provided with the kit, made by Sarah, aka Grand Designs Posers.
No filters required.

Now, let’s get started. It might be helpful if you choose the elements you wish to use beforehand, and open them up in PSP prior to starting the tutorial. That way, you have them handy when following each step.
Also, you don’t have to slavishly follow each positioning nor setting – play and experiment a bit, especially if you use different elements.
If you are unsure how to position an element, refer back to my sample tag.
I do assume you have at least some to moderate experience and understanding of PSP.
The DropShadow throughout the tutorial remains the same: V/H 3/1 O/B 41/6.55.
Resizing throughout the tutorial is done with “Resize all Layers” NOT checked.

Open new image 600 x 600 px.

Open Hearts.
Resize 25%.

Open Paper10.
Copy.

Magic Wand.
Click inside three frame sections (left / center / right).
Selections – Modify – Expand by 3.

Bottom layer.
(Should be empty, if not
New Layer
Arrange – Send to Bottom).
Paste into Selection.
Keep Selection.

New layer.
Effects – Cutout:
Vertical & Horizontal: 5
Opacity: 15
Blur: 12.33
Shadow Color: Black
No Fill color.
Selections – Select none.

Merge visible.

Open Flower 8.
Copy & paste.
Resize 17%.
Arrange – Send to Bottom.
Position center, top, a little to the right.

Duplicate flower.
Mirror.
Flip.
Position lower left.

On frame layer.

Open Flower 3.
Copy & paste.
Resize 20%.
Lower right.

Open Butterfly bow 2.
Copy & paste.
Resize 20%.
Upper left.

Open Dragon Fly 4.
Copy & paste.
Resize 10 %.
Upper right.

Open Patchwork Teddy.
Copy & paste.
Resize 15%.
Lower right.

Open GDP_Dorothyset1c.
Copy & paste.
Resize 15%.
Lower left.

Apply Dropshadow as desired.

Then, it is time to add any further text, copyright information and watermark to the graphic.

Feel free to merge all layers visible and then resize to your liking or crop the image.
If you prefer a transparent background, save your tag in PNG format.
Otherwise, if you select the JPG, it will automatically add a white background.
Should you care for a different colored background:
New layer, arrange, send to bottom, and floodfill with your color of choice.

I hope you enjoyed this tutorial!

XOXOXO,
Dani
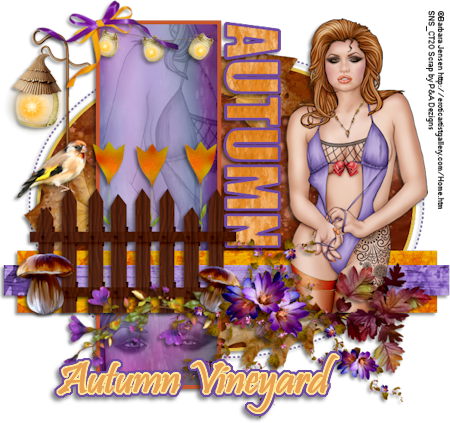
Tut - Autumn Vineyard


Autumn Vineyard

This tutorial is my own creation and based on my own ideas. Any and all similarities with any other tutorial is purely coincidental.
Please do not upload to or offer this tutorial on any other site without asking me first. Thank you.
Material you will need:

PaintShopPro – I’m using PSP X2, but you should be able to follow the tutorial in any version.
A scrap kit – I used the fabulous kit Autumn Vineyard by P&A Dezigns. Find a list of stores she sells at on her blog.
A font of your choice.
A tube of your choice. I used Suits Me by Barbara Jensen, which is an exclusive you can purchase at Scraps N Crap.
1 tag template –I used TracyF.Designz-AutumnTemplate7, created by Tracy, which you can download here.
No filters required.

Now, let’s get started. It might be helpful if you choose the elements you wish to use beforehand, and open them up in PSP prior to starting the tutorial. That way, you have them handy when following each step.
Also, you don’t have to slavishly follow each positioning nor setting – play and experiment a bit, especially if you use different elements.
If you are unsure how to position an element, refer back to my sample tag.
I do assume you have at least some to moderate experience and understanding of PSP.
The DropShadow throughout the tutorial remains the same: V/H 3/-3 O/B 48/5.78.
Resizing throughout the tutorial is done with “Resize all Layers” NOT checked.

Open template.
Duplicate.
Close original.
Delete copyright information layer.

dottedcircle layer.
Selections – Float/Defloat.
New layer.
Fill with color/gradient/pattern of choice.
Selections – Select none.
Delete original dottedcircle layer.

Circle layer.
Selections – Float/Defloat.
Open Paper9 and copy.
On template.
New layer.
Paste into Selection.
Selections – Select none.
Delete original Circle layer.

Dotted Circle layer.
Selections – Float/Defloat.
New layer.
Fill with color/gradient/pattern of choice.
Selections – Select none.
Delete original Dotted Circle layer.

Rectangle layer.
Selections – Float/Defloat.
Open Paper6 and copy.
On template.
New layer.
Paste into Selection.
Selections – Select none.
Delete original Rectangle layer.

Open your tube.
Copy & paste.
Resize & position to liking.

On Rectangle layer.
DottedCircle layer.
Selections – Float/Defloat.
Selections – Invert.
On tube layer.
Hit ‘delete’.
Selections – Select none.
Delete original DottedCircle layer.

Optional:
Paste your tube more than once.
Resize & position to liking.
Repeat previous steps (selections)

Frame layer.
Selections – Float/Defloat.
New layer.
Fill with color/gradient/pattern of choice.
Selections – Select none.
Delete original Frame layer.

Close dotted Circle, Circle and DottedCircle layers.
On frame layer.
Merge visible.
Make all layers visible again.

Open Paper1.
Copy & paste.
Resize 70%

Strip1 layer.
Selections – Float/Defloat.
Selections – Invert.
On Paper1 layer.
Hit “delete”.
Selections – Select none.
Delete original Strip1 layer.

Open Paper2.
Copy & paste.
Resize 75%.

Strip2 layer.
Selections – Float/Defloat.
Selections – Invert.
On Paper2 layer.
Hit “delete”.
Selections – Select none.
Delete original Strip2 layer.

On text layer.
Selections – Float/Defloat.
Open Paper10 and copy.
On template.
New layer.
Paste into Selection.

Selections – Select Selection Borders.
Both Sides
Border Width: 2
Anti-Alias checked.

New layer.
Fill with color/gradient/pattern of choice.
Selections – Select none.
Delete original text layer.

Merge two text layers.
(Text & border)

Open tube again.
Copy & paste.
Resize & position to liking.

Add any further elements to liking.
Apply Drop shadow as desired.

Then, it is time to add any further text, copyright information and watermark to the graphic.

Feel free to merge all layers visible and then resize to your liking or crop the image.
If you prefer a transparent background, save your tag in PNG format.
Otherwise, if you select the JPG, it will automatically add a white background.
Should you care for a different colored background:
New layer, arrange, send to bottom, and floodfill with your color of choice.

I hope you enjoyed this tutorial!

XOXOXO,
Dani