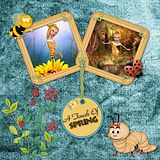
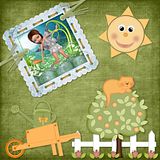
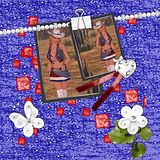
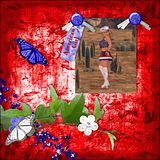
I've got 2 new LO's I made using the cute, adorable kit May Flowers by Country Hollow Creations (has some really beautiful elements and great papers in it).
LO 1
LO 2
Thank you for looking!
XOXOXO,
Dani


All Hallows Eve
This tutorial is my own creation and based on my own ideas. Any and all similarities with any other tutorial is purely coincidental.
Please do not upload to or offer this tutorial on any other site without asking me first. Thank you.
Material you will need:
PaintshopPro – I’m using PSP X2, but you should be able to follow the tutorial in any version.
A scrap kit – I used the wonderful kit All Hallows Eve by Cazie's Designs, which you can purchase here.
A font of your choice.
A tube of your choice.
No filters required.
Now, let’s get started. It might be helpful if you choose the elements you wish to use beforehand, and open them up in PSP prior to starting the tutorial. That way, you have them handy when following each step.
Also, you don’t have to slavishly follow each positioning nor setting – play and experiment a bit, especially if you use different elements.
If you are unsure how to position an element, refer back to my sample tag.
I do assume you have at least some to moderate experience and understanding of PSP.
The DropShadow throughout the tutorial remains the same: V/H 2/1 O/B 55/5.15.
Resizing throughout the tutorial is done with “Resize all Layers” NOT checked.
Open a new image, 600x600.
Open Cazie_All Hallows eve_frame02, copy & paste, 20%.
Open All_Hallows_eve_Paper5, copy.
With your Selection Tool, Point-to-Point, click around the center of the frame (try to stay fairly close to the inside edge).
New Layer, move underneath frame, layer, Paste into Selection, Selections – Select none, Merge visibly.
Apply Dropshadow.
Open Cazie_All Hallows eve_web, copy&paste, Resize 55%, move underneath frame layer.
Open All_Hallows_eve_Paper13, copy.
New layer, Arrange – Send to Bottom. Selections – Select all, Paste into Selection, Selections – Select none.
With your Magic Wand, click outside of the web, Selections – Invert, Selections – Modify – Expand by 3, Invert, Selections – Feather – 20, back to your paper layer and hit delete as many times as you wish, Selections – Select none.
Open Cazie_All Hallows eve_giftbox, copy&paste, Resize 10%, move to the bottom, and slightly to the left side of the frame.
Apply Dropshadow.
Open Cazie_All Hallows eve_caldron, copy&paste, Resize 13%, move to the bottom righthand corner of the frame.
Apply Dropshadow.
Optional: I erased part of the bottom of the candleholder.
Open Cazie_All Hallows eve_WingedSkull, copy&paste, Resize 45%, move to the top of the frame, somewhat centered.
Apply Dropshadow.
Open tube of choice, copy&paste, Resize and position to liking – optional: depending on what tube you use, erase part of the tube that extends beyond frame edges.
Apply Dropshadow.
Open Cazie_All Hallows eve_word art 3, copy&paste, Resize to liking, and position to the bottom left.
Apply Dropshadow.
3 New layers.
On the very bottom one, Selections – Select All.
Open All_Hallows_Eve_Paper10, copy, on bottom layer, Paste into Selection (keep selection!).
Open All_Hallows_Eve_Paper12, copy, one layer above bottom layer, Paste into Selection (keep selection!).
Open All_Hallows_Eve_Paper11, copy, third new layer (top of the 3 new layers we created), Paste into Selection, Selections – Select none.
Bottom layer, Resize 58%, Free Rotate – Left – 5 degrees, Apply Dropshadow.
Middle layer, Resize 57%, Apply Dropshadow.
Top layer, Resize 58%, Free Rotate – Right – 5 degrees, Apply Dropshadow.
Now, the next step is to add any further text, copyright information and your watermark to the graphic.
Feel free to merge all layers visible and then resize to your liking or crop the image.
If you prefer a transparent background, save your tag in PNG format.
Otherwise, if you select the JPG, it will automatically add a white background.
Should you care for a different colored background:
New layer, arrange, send to bottom, and floodfill with your color of choice.
I hope you enjoyed this tutorial!
XOXOXO,
Dani


Always Red & Black
This tutorial is my own creation and based on my own ideas. Any and all similarities with any other tutorial is purely coincidental.
Please do not upload to or offer this tutorial on any other site without asking me first. Thank you.
Material you will need:
PaintshopPro – I’m using PSP X2, but you should be able to follow the tutorial in any version.
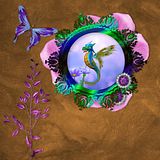
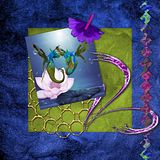
A scrap kit – I used the great kit Always Red & Black by Crystal’s Creations, which you can purchase here.
A font of your choice.
A tube of your choice.
No filters required.
Now, let’s get started. It might be helpful if you choose the elements you wish to use beforehand, and open them up in PSP prior to starting the tutorial. That way, you have them handy when following each step.
Also, you don’t have to slavishly follow each positioning nor setting – play and experiment a bit, especially if you use different elements.
If you are unsure how to position an element, refer back to my sample tag.
I do assume you have at least some to moderate experience and understanding of PSP.
The DropShadow throughout the tutorial remains the same: V/H 2/2 O/B 50/6.19.
Resizing throughout the tutorial is done with “Resize all Layers” NOT checked.
Open a new image, 600x600.
Open frame1, copy&paste, Resize 20%.
With your Magic Wand, click inside the frame, Selections – Modify – Expand by 2.
Open Paper10, copy.
New layer, move underneath frame layer, Paste into Selection, Selections – Select none.
Open your tube, copy&paste, Resize and position to liking inside the frame. Erase the parts you don’t want to show on your finished tag if parts are extending past the frame.
Apply Dropshadow.
Open black gem, copy&paste, Resize 12%, move to the upper right corner, duplicate twice and form a vertical line.
On top gem layer, merge down twice (all three gems), move underneath tube layer if necessary.
Apply Dropshadow.
Open rope beadeds, copy&paste, Resize 20%, move to the right side of the frame.
Apply Dropshadow.
Open butterfly2, copy&paste, Resize 12%, move to the upper right corner.
Apply Dropshadow.
Open Paper 5, copy&paste, Arrange – Move to Bottom, Resize 40%, Free Rotate – Left – 30 degrees.
Apply Dropshadow.
Open Paper 1, copy&paste, Resize 40%, Free Rotate – Right – 13 degrees.
Apply Dropshadow.
Open Paper 8, copy&paste, Resize 40%, Free Rotate – Left – 5 degrees.
Apply Dropshadow.
Now, the next step is to add any further text, copyright information and your watermark to the graphic.
Feel free to merge all layers visible and then resize to your liking or crop the image.
If you prefer a transparent background, save your tag in PNG format.
Otherwise, if you select the JPG, it will automatically add a white background.
Should you care for a different colored background:
New layer, arrange, send to bottom, and floodfill with your color of choice.
I hope you enjoyed this tutorial!
XOXOXO,
Dani
Country Cow
This tutorial is my own creation and based on my own ideas. Any and all similarities with any other tutorial is purely coincidental.
Please do not upload to or offer this tutorial on any other site without asking me first. Thank you.
Material you will need:
PaintshopPro – I’m using PSP X2, but you should be able to follow the tutorial in any version.
A scrap kit – I used the adorable kit Country Cow by Connie’s Creative Chaos, which you can purchase here.
A font of your choice.
A tube of your choice.
No filters required.
Now, let’s get started. It might be helpful if you choose the elements you wish to use beforehand, and open them up in PSP prior to starting the tutorial. That way, you have them handy when following each step.
Also, you don’t have to slavishly follow each positioning nor setting – play and experiment a bit, especially if you use different elements.
If you are unsure how to position an element, refer back to my sample tag.
I do assume you have at least some to moderate experience and understanding of PSP.
The DropShadow throughout the tutorial remains the same: V/H -2/1 O/B 45/5.33.
Resizing throughout the tutorial is done with “Resize all Layers” NOT checked.
Open a new image, 600x600.
Open CountryFrame3DS, copy&paste, Resize 50%.
Open CountryPaper07, copy.
On image, New Layer, Arrange – Move to Bottom, Paste into Selection, Selection – Select none.
Open your tube, copy&paste, Resize and position to liking inside the frame (erase any parts extending past the frame you don’t want on your finished tag).
Apply Dropshadow.
On frame layer, merge down twice (layer, tube & paper).
Apply Dropshadow.
Open CountryFlowers4rose, copy&paste, Resize 62%, move underneath frame layer.
Apply Dropshadow.
Open CountryBow4rose, copy&paste, Resize 30%, move to the upper right corner of the frame.
Apply Dropshadow.
Open CountrySummer2rose, copy&paste, Resize 27%, move to the bottom of the frame, a bit to the right.
Apply Dropshadow.
Open CountryFlowers2rose, copy&paste, Resize 27%, move to the lower left side of the frame.
Apply Dropshadow.
Now, the next step is to add any further text, copyright information and your watermark to the graphic.
Feel free to merge all layers visible and then resize to your liking or crop the image.
If you prefer a transparent background, save your tag in PNG format.
Otherwise, if you select the JPG, it will automatically add a white background.
Should you care for a different colored background:
New layer, arrange, send to bottom, and floodfill with your color of choice.
I hope you enjoyed this tutorial!
XOXOXO,
Dani
Vintage Angel
This tutorial is my own creation and based on my own ideas. Any and all similarities with any other tutorial is purely coincidental.
Please do not upload to or offer this tutorial on any other site without asking me first. Thank you.
Material you will need:
PaintshopPro – I’m using PSP X2, but you should be able to follow the tutorial in any version.
A scrap kit – I used the beautiful kit Vintage Angel by P & A Dezigns, which you can purchase here.
A font of your choice.
A tube of your choice.
No filters required.
Now, let’s get started. It might be helpful if you choose the elements you wish to use beforehand, and open them up in PSP prior to starting the tutorial. That way, you have them handy when following each step.
Also, you don’t have to slavishly follow each positioning nor setting – play and experiment a bit, especially if you use different elements.
If you are unsure how to position an element, refer back to my sample tag.
I do assume you have at least some to moderate experience and understanding of PSP.
The DropShadow throughout the tutorial remains the same: V/H 0/2 O/B 40/6.85.
Resizing throughout the tutorial is done with “Resize all Layers” NOT checked.
Open a new image, 600x600.
Open frame3, copy&paste, Resize 70%.
Open envelop2, copy&paste, Resize 60%, move on top of frame and use your Selection Tool, Point-to-Point to erase all parts of the envelop you wish to erase.
Alternatively: use the Selection Tool to select the frame, New Layer, underneath frame layer, open paper of choice, copy and on new layer, Paste into Selection, Selection – Select none.
Open butterfly1, copy&paste, Resize 45%, place on top of frame/envelop, Free Rotate – Left – 50 degrees and position towards the upper right side of frame.
Apply Dropshadow.
Open carriage1, copy&paste, Resize 40%, Mirror, position to the lower left side of the frame.
Apply Dropshadow.
Open Chain 3b2, copy&paste, Resize 45%, move underneath Carriage layer, duplicate, place to liking, and use your Selection Tool to erase the parts extending over frame.
Apply Dropshadow.
Open bow11, copy&paste, Resize 30%, Free Rotate – Left – 35 degrees, and position to the right, on top of the chains (or to your liking).
Apply Dropshadow.
Open Cluster2, copy&paste, Resize 35%, move to the upper left corner.
Apply Dropshadow
Open your tube, copy&paste, Resize and position to liking.
Apply Dropshadow.
Now, the next step is to add any further text, copyright information and your watermark to the graphic.
Feel free to merge all layers visible and then resize to your liking or crop the image.
If you prefer a transparent background, save your tag in PNG format.
Otherwise, if you select the JPG, it will automatically add a white background.
Should you care for a different colored background:
New layer, arrange, send to bottom, and floodfill with your color of choice.
I hope you enjoyed this tutorial!
XOXOXO,
Dani